 |
| Blenheim Apricot Jam |
Recipe by Robin
As noted in an earlier post, an apricot tree fell on my house recently and reminded me that I had some Blenheim apricots in the freezer from last summer. As promised, I made some apricot jam in addition to the apricot chicken. Frozen fresh apricots produce a fair amount of liquid—especially if many months go by before they are thawed (not recommended!) This liquid/solid combination seems well-suited to making jam. You could also try this with reconstituted dried apricots. Use 2/3 – 1 cup dried apricots and add water to equal 2 cups. Let it sit overnight in the fridge.
Note that this is a "refrigerator jam," meant to be eaten within a short time period. Store it in the refrigerator as soon as it's cool, and eat it within about 2 weeks. This is best practice because we are doing only a quick, easy sterilization of the jar for this small quantity.
I try to use as little sugar as possible in this jam. The flavor of the Blenheims is complex and delectable without any sugar, but the chemistry of getting jam to gel requires sugar. In an almost magical way, heat makes sugar interact with pectin, a naturally occurring component of fruit, and the fruit “soup” becomes jam. Apricots don’t have much pectin, and one option would be to add commercially available pectin and extra sugar to make a firm jam. I prefer to add as few ingredients to the apricots as possible, and have a softer jam. The apricots themselves, when cooked, have a characteristic and pleasant texture.
Each batch of apricots is a little different, so I add sugar by the tablespoon just until it is gelled enough. Often, the jam suddenly becomes clearer and glossy at this magic moment. To check how gelled the jam is, scoop out a spoonful onto a plate and put it in the fridge till it’s cool. See if you like the texture. If you want it firmer, add another spoonful of sugar and keep cooking.
I’m a second-generation jam-maker, and have never had formal training. As you can tell from my recipe, I’m more hands-on than by-the-book about jam-making. I’m taking my very first jam class on July 9 at our CSA farm (Live Earth Farm), presented by the Happy Girl Kitchen, our local food preservationists. I look forward to sharing some more method-oriented tips in a future “Apricot Jam II” post, where I’ll use fresh fruit.
Apricot Jam I
makes about 1-1/2 cups
2 cups frozen apricots and juice, thawed
¼ cup sugar, approximately, superfine granulated preferably
boiling water
1 pint glass jar with lid
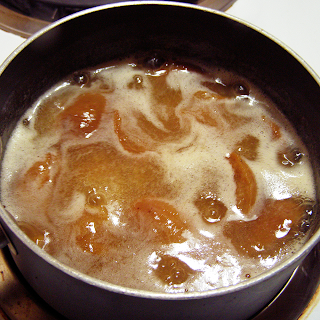
Bring apricots and their juice to a boil in a saucepan over medium-high heat. Boil about 8 – 10 minutes, stirring constantly, till skins start to break up and texture becomes uniform.
 |
| Apricot Jam Ready for the Jar |
Turn the prepared jar right-side-up and pour jam into it, ideally using a heat resistant spatula and a jam funnel
 . Screw on the lid and invert the jar (so hot jam goes to the top of the jar) for 5 minutes. Turn right-side-up, cool the jam, then store in refrigerator. Eat the jam within about 2 weeks.


No comments:
Post a Comment