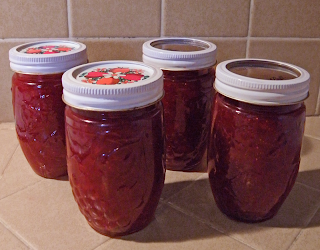
 |
| Now and Later, to Keep and Share |
Recipe by Robin
Strawberry season. Here on the central CA coast, we are
blessed with a long one, often beginning in late April and sometimes extending
into November. In fact, it was the prospect of a season-long supply of Live Earth Farm strawberries that
inspired me to sign up for their weekly CSA produce boxes.
By this time of the season, eating fresh strawberries is no
longer a novelty, yet they’re still at their peak of flavor and freshness.
We’ve eaten them plain, dipped
them, drunk
them, shortcaked
them, frozen
them, and even saladed
or balsamic-minted
them. What’s next? That’s right, strawberry jam!
 |
| Beginning to Look Like Jam |
There are various methods of knowing when your jam is
gelled. I like the direct approach: if you think it might be ready, chill a
small amount and see if it seems like jam (details in recipe below). Different
jam recipes produce different jam textures, from a loose spoonable crushed
fruit texture to a classic firmer gelled texture. Since this is essentially an
old school recipe, it tends towards firmer texture.
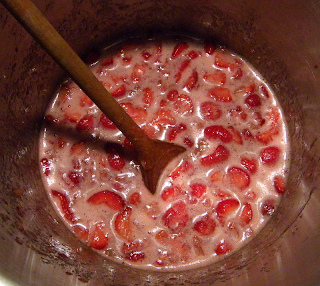 |
| At First Strawberries Release Lots of Air |
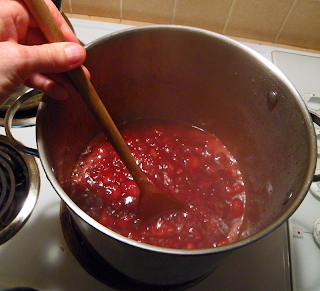 |
| Boil Till Foam Subsides |
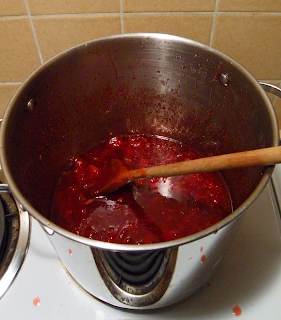 |
| Jam at the Gel Point, Ready to Jar |
This recipe is great for beginners because it uses
commercial pectin, which reduces the chance of jam not gelling. Pectin occurs
naturally in most fruits, but not in great quantity in strawberries. So we need
to add some extra to get to the old school gel texture. Be sure to use Low
(or No) Sugar pectin, not general-purpose pectin. Gel happens when pectin
sugar, and acid combine chemically, so don’t adjust the amount of sugar.
However, you may substitute regular white sugar for raw if you like. Note that
I let the fruit sit with the sugar and pectin for an hour or two to macerate,
but you can eliminate that step if you prefer. Happy jamming!
makes 6 cups
1 – 20 oz. can no-sugar crushed pineapple
~ 4 pints strawberries
1 box low-sugar
pectin (Sure Jell)
4 cups evaporated cane juice (raw sugar)
1 tbsp. fresh lemon juice
Sterilize clean jars by boiling in water for 20 minutes.
This recipe makes about four 12 oz. jars, or five to six 8oz. jars. Boil an
extra jar or two in case you need it. Remove jars with jar
lifter and let drain inverted until dry. Put lids rings into bowl and cover
with very hot (not boiling) water.
Put 2 – 3 saucers into freezer. You’ll use these later to
test whether jam has gelled.
Open can of pineapple and measure in large measuring cup,
without draining any liquid.
Wash, hull, and slice strawberries. Crush about 1 cup
strawberries at a time with potato masher. Add enough strawberries to pineapple
to make 5 ½ cups total. Be sure fruit is compacted, with no space between the
berries.
In a deep 8 quart saucepan, mix low-sugar pectin together
thoroughly with sugar, crushing all lumps. Add mixed fruit and lemon juice and
stir to blend. Let it sit to allow fruit to macerate for 1 hour or more. Stir
again.
Heat mixture over medium high heat till boiling, stirring
constantly, about 10 minutes. Continue to heat and stir while strawberries
release air bubbles. Cook until mixture stops foaming, about 12 minutes.
When foaming subsides, turn heat to high. Stir constantly
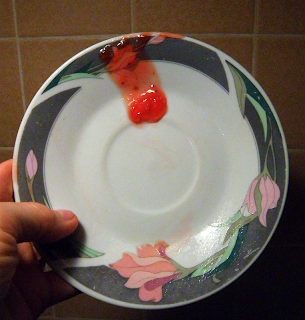
until gel point is reached, about 10 minutes or less. Test jam periodically:
remove jam from heat, drop a spoonful of jam on a chilled plate, return it to
the freezer for a minute, and see if it slides down the plate in one blob like jam (see
photo above). If it doesn't stay together, or runs in rivulets, keep boiling!
When test indicates that jam is gelled, remove jam from heat
and fill pre-sterilized jar using a ladle and jam
funnel. Fill to ¼ inch from jar top. Wipe rim of jar with damp cloth if jam
has spilled (funnel should eliminate most of this problem). Pick up sterilized
lid with lid
lifter, and shake off water. Cap jar with lid. Screw on ring finger tight
using only one finger--don’t screw on tight! Air will release during hot water
bath processing.
Process jars in a boiling water bath for 5 (4 oz jars) or 10
(12 oz jars) minutes. Remove from bath with jar lifters. Place hot jars on a towel—not
onto a cold tile surface! Tighten up rings when cool enough to handle.
Let sit overnight, or at least 12 hours. Check tops of jars
to ensure that lids have sealed; lids should not “snap” down when pressed with
thumb. If any jars have not sealed, either reprocess them or store in
refrigerator and eat within 2 weeks.
Hi Robin,
ReplyDeleteI read your post -- nice pictures and a lot of very good information about making jam. I am a partner in the small company that sells Pomona's Universal Pectin, which I thought you might be interested in knowing about, if you don't already. With Pomona's, the jell is activated by calcium (which comes with the pectin), not by sugar content, so you can make jams and jellies with low amounts of any sweetener you choose, or even none at all. You are in control of the amount of sweetener. Pomona's is sold in natural food stores and food co-ops,as well as on the internet -- it is the only pectin out there with no added sugar or preservatives. Good luck to you and happy jamming!
Thanks for letting us know about your no preservative pectin, Mary Lou. I'll see if I can find it at our local natural foods store. I'm guessing that since it's not sugar-activated it would be appropriate for use with honey-sweetened preserves, which are usually difficult to get to gel?
DeleteI just made this jam this morning - yummy! Skipped the pectin though, and long-boiled it :-)
ReplyDeleteGlad that you liked the recipe, Alicia. Thanks for experimenting and letting us know that we needn't use the pectin! I'll try that next time. :)
Delete