 |
| Dried Heirlooms & Super Bushes |
Method from Excalibur and TomatoDirt
Tomatoes! Here in the Santa Cruz mountains, we still have
them ripening like crazy in the garden. I’ve made baked
tomato sauce and slow cooker tomato
sauce, which I’ve frozen for a rainy (January) day. Bruce made raw
tomato sauce and I experimented with baked tomatoes
and even candied
tomatoes. We’ve had herbed
tomato soup, fresh tomatoes
with basil and balsamic, chili spiced
Romanesco cauliflower, turkey Hungarian
goulash, squash
with fresh tomato sauce, and more tomato/veggie/pasta dishes and salads
than we can count. Freezer is filling up. What’s next? Dried tomatoes!
 |
| All Varieties Can Be Dried |
 |
| Preparing Heirlooms for Drying |
 |
| All Varieties Dried |
There are two basic dehydrator styles. One is round and
requires the user to stack up trays. The other is square with drawers that the
user pulls out. The latter is more convenient to set up and to check while
warm, but costlier. To me the investment in not lifting trays while checking each layer of tomatoes and removing dried
ones was worth it. I went for an Excalibur dehydrator.
 |
| During the Drying Process |
Drying time depends upon the tomato’s thickness and species.
For me, watery yellow heirlooms and cherry tomatoes took the longest. Dry
farmed Early Girls took the least amount of time, with Renee’s SuperBush tomatoes a close second. I understand that Romas also dry relatively
quickly, especially if seeds are removed. Each variety has a characteristic
flavor. Of the tomatoes I tried, Renee’s SuperBush had the most concentrated flavor. My understanding is that Romas are
also excellent flavor-wise.
TomatoDirt.com
is a great resource for further information about drying tomatoes, and
everything else about gardening with tomatoes.
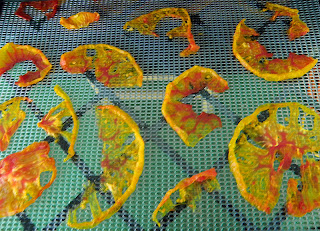
Wash and dry tomatoes. Spray top of dehydrator mesh tray
liners with very light coat of nonstick spray if desired to minimize sticking.
Line trays with mesh.
Remove the core from slicing tomatoes. Cut into ¼” or
smaller slices. Cut cherry and grape tomatoes in half. Remove seeds and extra
liquid from slices and halves if desired.
Place tomatoes on dehydrator trays. Leave ½” between slices
for maximum air circulation. Put cherry and grape tomatoes on trays with skin
side down.
Slide drawers into dehydrator or stack trays. Close lid and
turn temperature to 135 degrees F.
Check after about 5-6 hours. Turn partially tomato slices
over. Depending upon how close they are to dry, check every 1-2 hours, turning
over slices that have stuck to the mesh again. Remove slices as they dry. When
dry, tomatoes will be dry and leathery, not tacky. They will still be flexible.
Cool dried tomatoes completely. Store in air-tight container
in a cool, dry place. Refrigeration is not necessary.

Drying or dehydrating things for the first time. I did strawberries and apples and ready to do tomatoes . I feel nervous about keeping finished product in a non frozen space.
ReplyDeleteOr in the fridge as I've one so far with the strawberries and apples.
I'd love to put my dried tomatoes (ths week) in jars in the pantry.
I guess if they are all VERY dry, they won't get moldy, etc?
Sorry for the delay in my reply, my hard drive crashed last week. I store my dried tomatoes in zip locks, and they keep for up to one year--that's as long as I've been able to store them without using them up. Jars ought to work fine if, as you say, they are VERY dry.
DeleteMy storage area (cabinet) is cool to moderate temperature, medium to low humidity and dark.
My only concern about the jars would be if/when your climate is extremely humid and moisture gets into the jars as you open and close them. In that case, using a series of smaller (1/2 - 1 pint) jars would limit the amount of humidity that gets into each jar. Or you could open one large jar and "decant" a cup or two of tomatoes into a 1 pint jar every so often, then open the smaller jar as needed.
I'm glad to hear that you're dehydrating, and especially about the apples, which I've been debating whether to try out. You've inspired me to give it a go!
There are many other benefits to using food dehydrators besides the ability to make low-cost healthy foods. They are very easy to use and clean. Although they come in a variety of models, sizes and features, they are all very easy to operate. 06301 dehydro review
ReplyDeleteThanks
ReplyDeleteThe two models used for your article are among the best, but, there are more choices definitely worth mentioning, and you can find some other models in this article I found on the web. It also talks about what to look for when searching for the best food dehydrator for yourself, and reviews. You can check it out here: http://hikingmastery.com/top-pick/best-food-dehydrator.html
ReplyDeleteAn electric dehydrator ought to have a temperature control, plate with loads of ventilation, and a fan to flow the air. A few units have an on and off switch while others should be unplugged. Costs keep running from about $50 for an American Harvest brand to a few hundred dollars for the most elite, the Excalibur.
ReplyDeleteFD 1040 Gardenmaster review
Most dehydrators have a temperature indoor regulator to keep up the ideal temperature and a fan to circle new dry air. Best dehydrators online in India
ReplyDeleteI strongly recommend staying away from any dehydrator that does not come with a fan and thermostat. metal dehydrator
ReplyDelete